(800) 728 8391


Quick summary:
- 📈 Drone advertising helps listings perform better. It builds trust and often leads to faster buyer decisions.
- 🎥 Strong results come from planning and execution. You need the right settings, clean composition, smooth camera moves, and solid editing.
- 📝 Professional use comes with clear rules and costs. Once you handle FAA licensing, MLS guidelines, and basic insurance, you can use drone content with confidence.
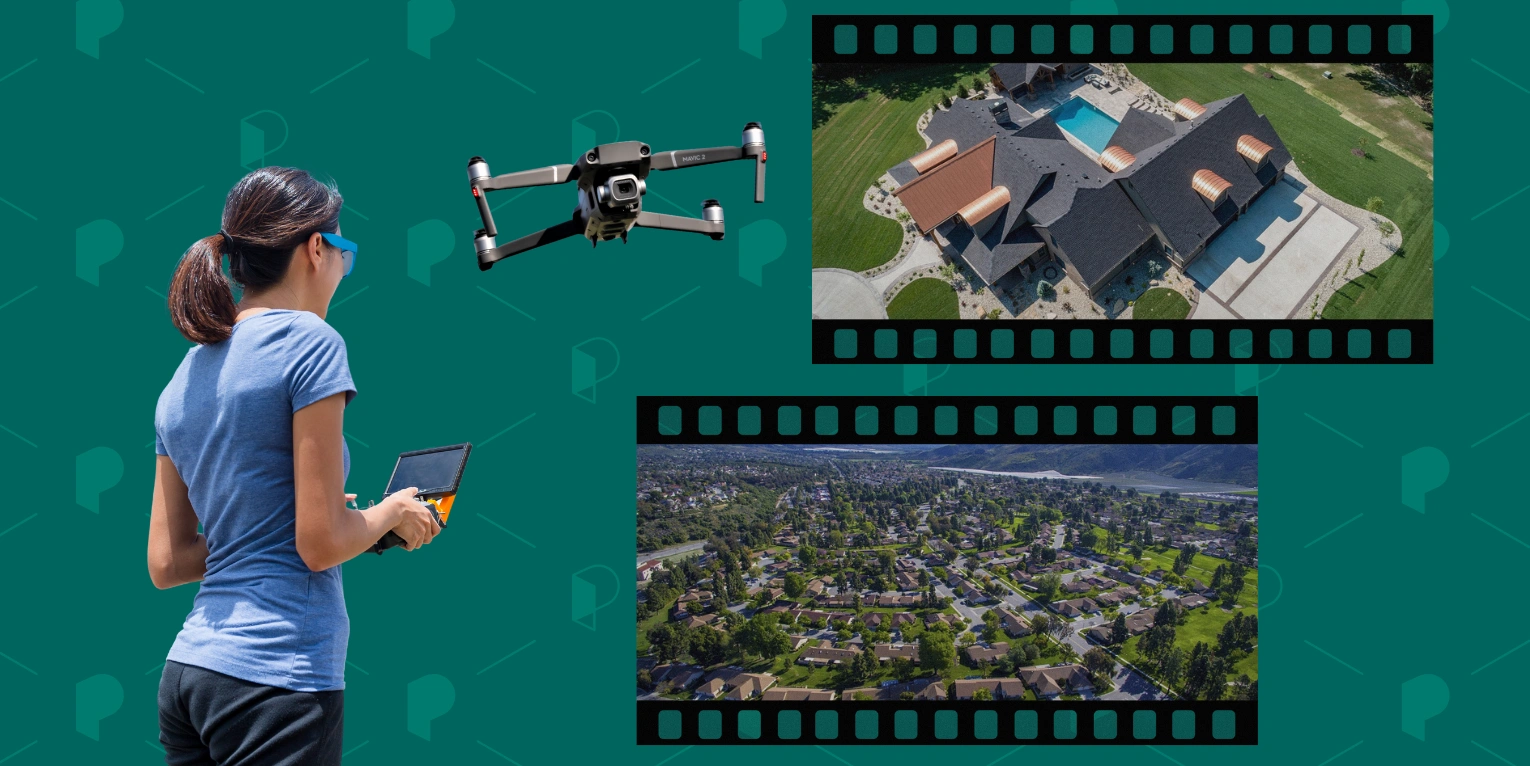
Drones are small unmanned aircraft that you control remotely. You may also hear them called UAVs (unmanned aerial vehicles), quadcopters, or aerial cameras. In real estate, they capture photos and video from angles you cannot get from the ground. They show scale, layout, surroundings, and location context in a single shot.
For many listings, especially luxury, land, and new builds, drone content sets the tone from the first click. It helps buyers understand the property before they book a showing. The numbers show how fast adoption is growing.
52%
In 2024, about 35% of real estate agents in the U.S. used drones in their marketing. One year later, in 2025, that number jumped to 52%.
Source: NAR Technology Survey
Drone videography services are in high demand, and that demand keeps growing. You can outsource them to a professional or learn to fly a drone yourself. This guide breaks it all down for 2026. You will learn how drone photography works in real estate, when it pays off, and what rules you must follow.
What is real estate drone photography?
Real estate drone photography is the use of drones to capture aerial photos and videos of homes for marketing and presentation. It includes both still images and video footage taken from above and around the property.
Photos focus on layout, lot size, views, and surroundings. Video adds motion and flow. Together, they give homebuyers a clearer picture than ground shots alone.
The process is straightforward, but it takes more than a single flight. You either own a drone and know how to fly it well, or you hire a company that does this work every day. Many agents choose commercial drone services to save time and avoid mistakes.
The flight itself is only one part of the job. You plan the shots in advance and check the weather and airspace rules. Then you capture photos and aerial footage from specific angles and heights. Experience matters here. Poor framing or shaky movement can ruin the result.
Post-production is just as important. Raw material needs editing. This means cutting, color correction, and smooth transitions. You also need a good eye for aesthetics. Without it, even high-quality footage can look flat or chaotic.
Once finished, you can use these materials in many ways. Add them to property listings to boost click-through rates. Share them on social media to grab attention fast. Use them on your website, in ads, or in email campaigns. Done right, drone content works across your entire real estate marketing stack.
👉 Explore the top real estate marketing trends for 2026.
Why real estate drone photography matters? 7 key benefits
Drone real estate photography has become a practical tool that helps listings perform better.
68%
Properties with aerial images sell 68% more often than those without them.
Source: NAR
This single data point explains why so many agents invest in drone content. Better visuals lead to better outcomes. Below are the key reasons why drone photography matters in real estate:
1. It shows the full picture 🖼️
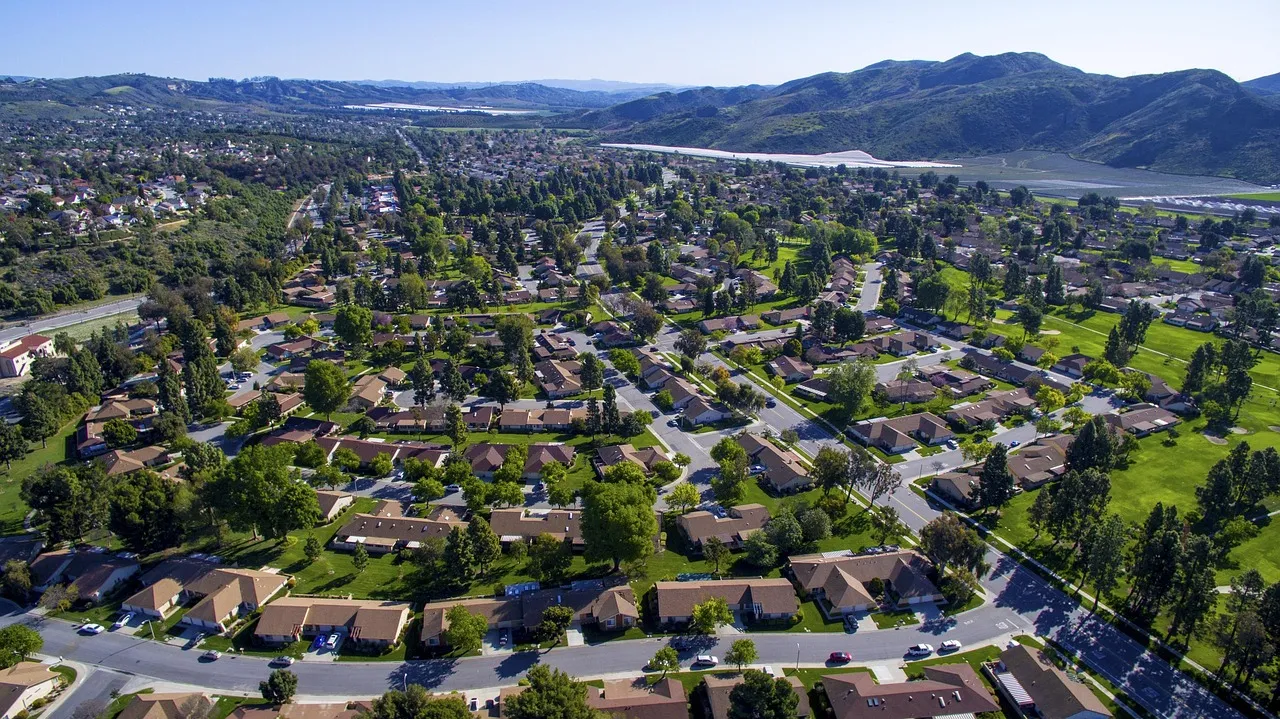
Ground photos tell only part of the story. Aerial images show lot size, layout, views, and surroundings at a glance. Potential buyers understand where the property sits and how it connects to the area. This clarity builds confidence early.
2. It grabs attention fast 👀
Listings compete for seconds of attention. Drone shots stop the scroll. They add scale and drama without exaggeration. This matters on listing platforms and even more on social media, where visuals decide what gets clicked.
3. It filters better leads 🎯
Aerial content answers questions before buyers ask them. They see access roads, nearby buildings, and the real setting. This reduces surprise and brings more qualified buyers to showings. As a result, you avoid wasted tours and have more productive conversations.
4. It raises perceived value 💰
Professional drone visuals make a listing feel premium. Even mid-range properties benefit from cleaner presentation. Strong aerial shots signal care, quality, and transparency. That perception often supports pricing discussions.
5. It works across all channels 🔁
You create once and use everywhere. Listings, social posts, ads, websites, and email campaigns all benefit from drone photography and videography. One shoot supports your marketing at every stage, from first impression to final decision.
👉 Find the best social networks for real estate professionals.
6. It reveals hard-to-see details 🧐
A drone gives you access to areas that are hard or risky to inspect from the ground. Roof condition, chimneys, gutters, or upper structures become visible in seconds. This allows you to show your clients that there is nothing to worry about.
7. It helps buyers picture everyday life 🏘️
Aerial videos and photos show more than the property itself. They say a lot about the neighborhood. Buyers can see the route to school, nearby streets, green spaces, and local shops. This makes it easier to imagine daily life in the area, not just the home.
When to use drone photography in real estate? 6 use cases
It’s best to use drone photography and video for large lots, premium listings, and unique locations. It works especially well when the surrounding context matters just as much as the building itself.
Aerial photos and footage bring clear, practical value in cases like:
1. Large lots and land listings 📏
When the property includes acreage, boundaries matter. Aerial views show shape, size, and access points in seconds. This helps buyers understand what they are getting.
2. Luxury and high-end homes 💎
Premium listings need premium presentation. Drone visuals support the price by showing views and privacy. They also match the expectations of high-end buyers.
3. Properties with strong location value 📌
Waterfront homes and hillside properties benefit from aerial context. The location becomes part of the story, not just a line in the description.
4. New construction and developments 🏗️
Drones help show progress and the surrounding infrastructure. They work well for pre-sales and updates over time. Buyers see how the project fits into the area.
5. Rural and remote properties 🐄
These listings are hard to understand from standard photos. Aerial content shows access roads, distance to neighbors, and nearby land use.
6. Marketing campaigns beyond the MLS 📢
Drone content shines in ads and social media. Short aerial clips work especially well for brand awareness and listing launches. They help you stand out outside the listing feed.
Legal rules for real estate drones
If you use drone marketing for real estate in the U.S., the law treats it as commercial work. That means clear rules apply, even if you fly only once in a while.
First, the operator must follow Federal Aviation Administration (FAA) regulations. Any drone flight used to promote a listing counts as commercial use. To fly legally, you need an FAA Part 107 certification. This applies whether you shoot photos yourself or record video for a single property.
To get FAA certification:
- You must be at least 16 years old and able to read, write, speak, and understand English.
- You take the FAA aeronautical knowledge test at an approved testing center. The exam costs $175, and you book it in advance.
- After you pass, you submit FAA Form 8710-13 through the FAA’s online system using your test ID. The review process can take up to 100 days.
- Once the FAA completes your TSA background check, you receive an email confirmation. You can then print a temporary remote pilot certificate, valid for 120 days.
- You get your permanent remote pilot certificate later by mail. To keep it active, you must renew it every two years by completing the required FAA testing again.
The drone itself must be registered with the FAA. The registration number has to be attached to the quadcopter. Most drones also need Remote ID, which broadcasts basic identification and location data during flight. Registration costs $5 and is valid for three years.
Flight rules matter just as much:
- You must keep the drone within visual line of sight.
- You cannot fly higher than 400 feet.
- You need special authorization to fly near airports or in controlled airspace.
- Flying at night is allowed only if the drone and pilot meet FAA requirements.
The FAA controls airspace, not privacy. It’s a separate issue, as states and cities can enforce their own rules. You must avoid capturing footage of neighboring properties in a way that invades privacy. This is especially important in dense residential areas.
To avoid legal trouble, you either get certified and learn the rules or hire a professional who already meets all requirements.
How to make the most out of real estate drone photography? 7 Tips
To maximize real estate drone work, focus on settings, composition, camera moves, and editing. Each of these elements plays a role in how your aerial content looks and performs. If you want consistent, professional results, follow the tips below:
1. Build a shot plan that fits the property
It’s tempting to launch the drone right away and start flying. That usually wastes battery and leads to missed shots. Take a few minutes to study the location first and lock your shot list before takeoff.
Define one strong hero angle. You can also add a roofline pass to show condition and shape. Then, include a backyard or lot-depth shot to show space. Finish with a few context shots that explain what surrounds the home.
Choose a window with clean light and low wind. It’s worth planning ahead. Review the area a day or two earlier. Tools like Google Earth help you understand the layout and obstacles. Apps like Sun Seeker show where the light will fall at different times. This prep work helps you capture everything you need and land with battery to spare.
2. Dial in the right drone settings
High-quality drone footage starts with the right settings. Auto mode works, but it rarely gives you consistent results. A few manual tweaks make a visible difference:
- Set resolution and frame rate. Shoot photos at full resolution. For recordings, use 4K video whenever possible. Set frame rate to 24 or 30 fps for smooth, natural motion. Avoid high frame rates unless you plan slow motion.
- Lock your ISO as low as possible. ISO 100 is the goal in daylight. Higher values add noise and hurt detail, especially in shadows. If the image looks too bright, fix exposure with shutter speed or filters, not ISO.
- Control shutter speed on video. A good rule is double your frame rate. At 30 fps, aim for a shutter around 1/60. This creates natural motion blur and avoids choppy footage.
- Set white balance manually. Auto white balance can shift mid-shot, which looks unprofessional. Pick a preset or dial in Kelvin based on conditions and keep it locked.
- Use a flat or neutral color profile (if your drone offers one). It preserves more detail and gives you flexibility in editing. Avoid overly vivid profiles for listings.
- Check focus and gimbal settings. Make sure focus is set correctly before recording. Keep gimbal movement slow and smooth. Fast tilts ruin otherwise great shots.
- Use an ND filter. It reduces the amount of light hitting the sensor and lets you keep the correct shutter speed in bright conditions. Without it, footage looks sharp and jittery.
Expert tip: Use ND8 or ND16 on bright but slightly overcast days. Switch to ND32 or ND64 in full sun.
3. Master composition
With the right composition, a single aerial shot can explain more than a full gallery of ground photos. That’s why you should use the rule of thirds and look for shapes and patterns.
The rule of thirds helps you place the subject where the eye naturally looks. Imagine the frame split into three equal parts, both vertically and horizontally. Position the home slightly off center, not in the middle. Align the roofline or horizon along one of these lines. This creates balance and makes the shot feel intentional.
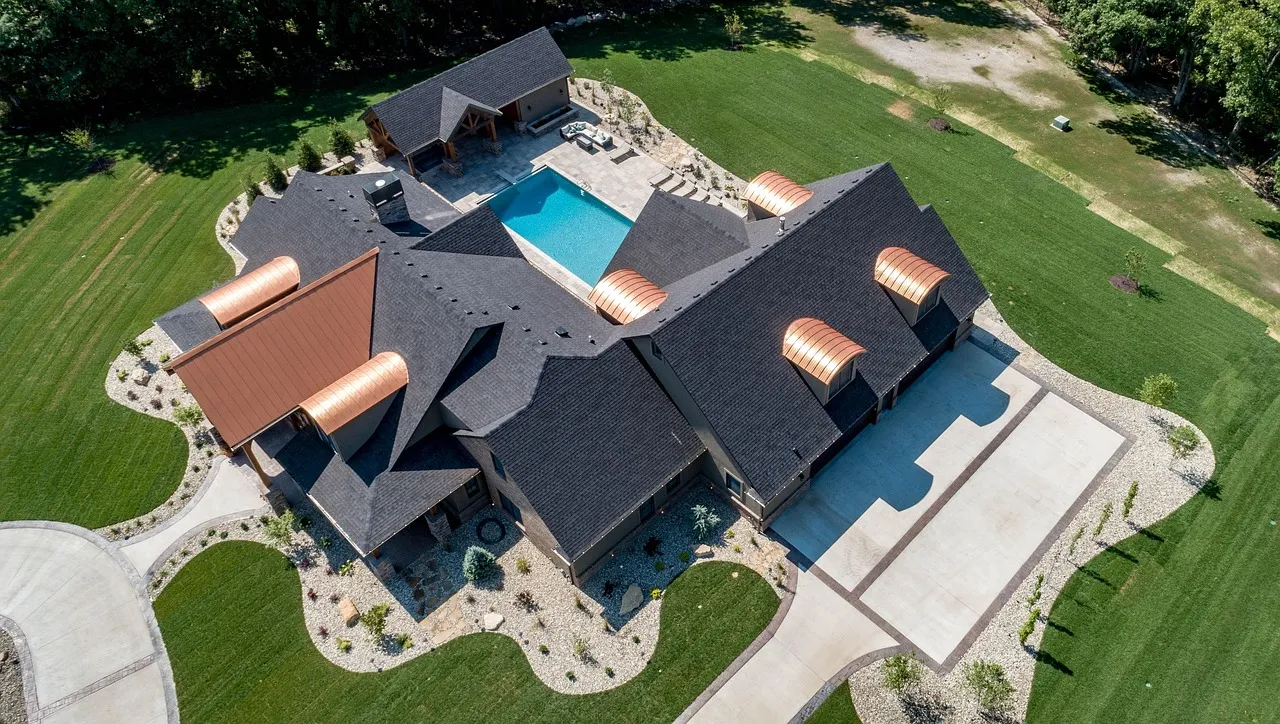
From the air, properties turn into shapes and patterns. Look for clean lines in roofs, driveways, pools, and streets. Repeating elements like townhomes, trees, or parking rows add order and scale. Symmetry also works well, especially for modern homes or straight-down shots. When both sides of the frame feel balanced, the image looks calm and premium.
Don’t forget about depth in aerial photography. It keeps shots from feeling flat. Use a clear foreground, such as a tree, driveway, or edge of the roof. Let the home sit in the midground and the neighborhood fill the background. Such separation adds context and space.
4. Use motion and speed to guide the viewer
Movement gives aerial footage its energy. Strong real estate drone shots rarely sit still. The drone moves through space while the property stays clear and readable. Even a slow push forward or a gentle slide past the home keeps the viewer engaged and focused.
Motion also helps tell the story of the listing:
- Flying toward the property creates a sense of arrival.
- Passing along the roofline or backyard shows scale and flow.
- Static shots can work, but only as short pauses.
Rely on movement to connect scenes and keep interest high.
Pay attention to speed, too. Fast flights look exciting on the controller screen, but they feel rushed on video. Slow, steady motion lets viewers absorb details and understand the space. It also keeps footage smooth and easy on the eye.
5. Experiment with drone cinematography moves
You don’t need fancy tricks. A small set of repeatable moves will cover most listings and give you enough variety for a clean edit:
🎬 The establishing push-in (high and wide)
Start far enough back to show the setting, then move forward slowly toward the home. This works best as your opening shot because it answers the first buyer question: “Where is it, and what does it sit on?”
🎬 The reveal (side slide into view)
Begin behind a tree line, fence, or corner of the roof, then slide sideways until the property appears. This move adds drama without feeling salesy. Use it when the home has strong curb appeal or expansive views.
🎬 The orbit (circle around the home)
Circle the building at a steady distance to show shape and landscaping. Keep it slow. Orbits shine on luxury homes and properties with pools or terraces.
🎬 The roofline pass (clean side-to-side tracking)
Track along one side of the roofline or facade. This highlights design lines and gives a premium feel. It also helps you show the backyard depth or exterior layout without sudden camera movement.
🎬 The top-down shot (straight overhead)
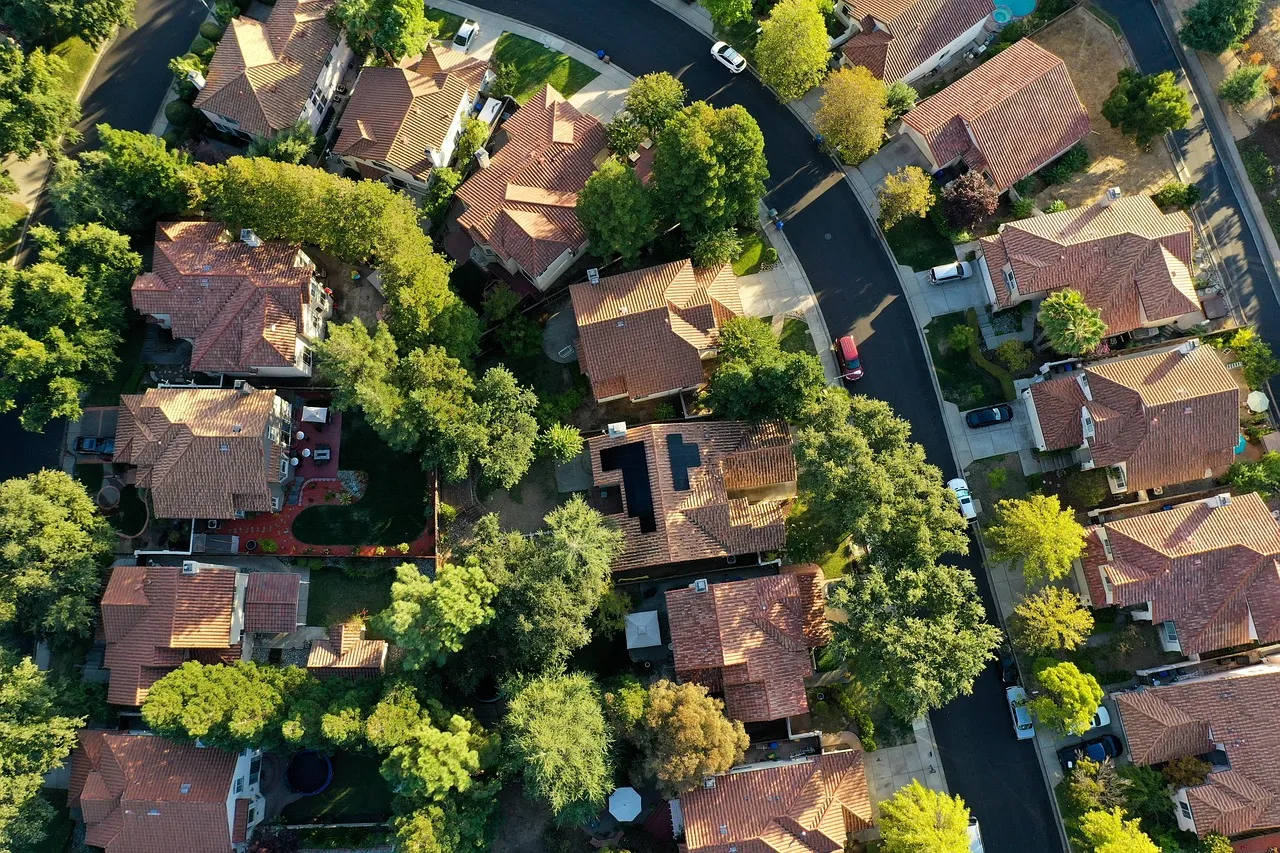
Fly above the property and point the camera straight down. This shot brings instant clarity. Use it to show lot shape, driveway layout, landscaping, or access points. It works especially well for land listings, new construction, and larger suburban properties.
🎬 The pull-up and pull-away (closing shot)
Start near a key feature, then rise and slowly back away. This reveals the full property and its surroundings. It works well as a closing shot.
👉 Read also: 21 Best Real Estate Videos Every Agent Should Watch in 2026
6. Follow MLS guidelines
MLS rules vary by market, but the pattern stays the same: keep your media clean, property-focused, and unbranded. Many MLS compliance issues happen because agents upload the “marketing version” instead of the “MLS version.”
Most MLSs ban:
- Logos
- Names
- Phone numbers
- Websites
- QR codes
- Photographer watermarks.
Some even treat a visible “For Sale” sign as branding and will reject the photo. Also helpful labels like “pool,” “new roof,” or “walk to school” can trigger a denial. Put that info in remarks or captions, not on the image.
You also need to be careful during editing. Basic fixes like cropping and color correction usually pass. But once you add, remove, or change property features, you can trigger compliance problems. In California, a new law took effect on January 1, 2026. It requires clear disclosure when listing photos are materially altered. MLS platforms are already adding tools to label such images.
Expert tip: Create an MLS-ready set (no branding, no text, no gimmicks) and a marketing set (branding and callouts allowed for socials, ads, landing pages). This one habit prevents most rejections and saves you hours of rework.
7. Edit drone photos and video
Editing is where drone footage becomes real marketing material. Post-production decides whether the final result looks professional or rushed. Both photos and videos need a clear, repeatable process.
📸 Aerial real estate photography editing (stills):
- Fix white balance and exposure. You can use Adobe Lightroom to apply the same look across a full set of images. That matters when you mix drone shots with ground photos. Batch edits keep your gallery consistent.
- Straighten the horizon. Crooked aerials look careless right away.
- Correct lens issues and perspective (when needed). Some drones add subtle distortion. Lightroom’s lens correction and transform tools help you keep lines clean. Use Upright / Guided Upright when the shot feels “off,” but don’t overdo it.
- Sharpen with restraint. Add just enough sharpening to restore detail, then stop. If you see halos on roof edges or trees, you pushed it too far.
🎥 Drone real estate videography editing (recordings):
- Pick one editing app. Learn a repeatable workflow for Premiere Pro, Final Cut Pro, DaVinci Resolve, or any other. What matters is consistency, not the logo on the icon.
- Stabilize only when you must. Use stabilization if wind or quick inputs created micro-jitter. Over-stabilizing can warp edges and make buildings look “rubbery.”
- Color-correct before you upgrade. Make the footage accurate: exposure, highlights, shadows, white balance. Only then fine-tune the look.
- Keep motion smooth in the edit. Trim out the moments where you start, stop, or change direction. Cut on stable movement. If a clip feels rushed, shorten it or replace it.
- Export for where the video will live. Create at least two versions, but don’t stretch one format into the other:
- Horizontal (16:9) for YouTube, websites, and listing pages
- Vertical (9:16) for Reels, TikTok, Shorts
👉 See which AI tools help real estate agents work smarter.
How much do real estate drone photographers make?
According to ZipRecruiter, most real estate drone photographers in the U.S. earn about $35,000 to $95,000+ per year, with many landing around $62,000–$70,000. This aligns with data from Indeed.
~$70K
In the U.S., the average drone pilot earns about $70,057 per year.
Source: Indeed
Data from Matterport and NAR shows clear price ranges for drone photography services in the real estate industry. A basic drone photo shoot typically costs a client $50–$400 per property. Full drone video or a virtual tour usually starts around $500 and can reach $1,000 or more.
Pricing varies based on:
- Your market: big metros and luxury markets pay more, but they also expect stronger results.
- Your package: photos-only pays less than photos + edited aerial video.
- Editing skill: clean color, smooth motion, and tight pacing often separate “cheap footage” from “premium work.”
- Volume and repeat clients: one-off shoots rarely beat steady relationships with top-producing agents and teams.
👉 Check the average salary of real estate agents in every U.S. state.
What are the initial costs of a real estate drone business?
A realistic startup budget for a professional real estate drone photography business falls between $1,200 and $3,500. It depends on your drone tier and whether you already own editing gear.
Here’s what makes up that total:
1️⃣ Legal and compliance costs (mandatory)
As mentioned before, you need to pay for:
- Part 107 exam: $175 for the initial knowledge test.
- FAA registration: $5 per drone, valid for 3 years.
- Remote ID (sometimes): about $100 for a common broadcast module (you may need it if your drone does not have built-in Remote ID).
2️⃣ The drone (your highest upfront cost)
Popular models that agents and creators use for listings include:
- DJI Mini 4 Pro: $759
- DJI Air 2S: $999
- Autel EVO Lite 6K Enterprise: $1579
- DJI Mavic 3 Pro: $2,199
All listed prices refer to the base version of each drone.
3️⃣ Batteries, storage, and basic kit (easy to underestimate)
Plan for these right away, because they affect how many homes you can shoot per day. They may cost anywhere between $200 and $800, depending on how serious you go:
- Extra batteries
- High-quality microSD cards
- ND filters (help you keep video smooth in bright daylight)
- Spare propellers
- A hard case or shoulder bag
- External SSD/HDD for backups
4️⃣ Editing software (if you don’t own it yet)
Common options include:
- Adobe Premiere Pro: $22.99/month (annual plan, paid monthly)
- Apple Final Cut Pro: $299.99 (one-time purchase)
5️⃣ Insurance (not always required, but often expected)
Many brokers, builders, and higher-end clients will ask for proof of liability coverage:
- Example: SkyWatch lists $108/month for $2M liability.
🟰 Quick “add it up” examples:
- Lean starter: drone $759 + FAA certificate $175 + registration $5 + basic kit $250 = $1,189 (plus software monthly).
- Solid pro starter: drone $999 + FAA certificate $175 + registration $5 + kit $500 = $1,679 (plus software monthly).
- Higher-end setup: drone $2,199 + FAA certificate $175 + registration $5 + kit $800 + Final Cut $300 = $3,479 (plus insurance).
👉 Discover the best paid real estate jobs and career paths.
Conclusions
The benefits of drone photography for real estate go beyond aesthetics. Aerial photos and video help listings sell faster, build trust, and stand out in a competitive market. They show context in a way ground photos simply can’t, which often leads to faster sales and better-qualified buyers.
If you follow the tips in this guide, you can create engaging real estate aerial photos and videos that support both your listings and your personal brand. With the right planning, flying, and editing, drone content becomes a repeatable marketing asset.
To make the most of it, you need the right place to showcase your work. An intuitive, well-designed IDX website built on Placester lets you build a portfolio that highlights your aerial content and attracts clients. It’s a smart choice for real estate marketing when presentation matters as much as performance.
AI Websites for Real Estate
Get a custom, ready-to-edit website
in less than 4 minutes.
FAQ
Do you need a license for real estate drone photography?
Yes, you do need a license for real estate drone photography in the U.S. Any drone flight used to market a property counts as commercial work and requires an FAA Part 107 Remote Pilot Certificate. If you want to become a real estate drone pilot, you must pass the FAA knowledge test and follow federal flight rules.
How to take real estate photos with a drone?
To take real estate photos with a drone, start by planning your shots and flying in good light with low wind. Use manual camera settings to keep exposure stable. For professional aerial results, fly slowly, frame clean angles, and shoot in high resolution to protect overall image quality.
What is the best drone for real estate photography?
The best drone for real estate photography right now for most agents is the DJI Air 3. It offers reliable performance, long flight time, and dual cameras that deliver sharp photos and high video quality. It also includes advanced features like omnidirectional obstacle avoidance and intelligent shooting modes. Other strong choices include the DJI Mini 4 Pro for lighter weight (under 250 grams) and the DJI Mavic 3 Pro if you want long battery life for premium listings.
Is drone registration required for real estate work use?
Yes, drone registration is required for real estate work in the U.S. Any use of camera drones for listing photos or video counts as commercial activity and must follow FAA rules. This means the drone must be registered with the FAA and flown by a certified Part 107 pilot.
Is drone insurance required for commercial use?
Drone insurance is not legally required at the federal level, but most commercial operators need insurance to work with clients. This applies to many industries, including real estate, where brokers, developers, and property owners often require proof of coverage. Liability insurance protects you from damage claims and helps you operate professionally.
Where you can and can’t fly a drone?
You can fly a drone in most open areas in the U.S. below 400 feet above ground level. You just need to follow FAA rules and keep the device in sight at all times. Without proper authorization, you cannot fly near airports or in controlled airspace, and some locations are off-limits entirely. National parks, military bases, and sensitive government sites usually ban drone flights, too. Remember that local restrictions may apply, so you should always check them before flying.
Published on
(Last updated on
)